There are two ways to add photos to your Canvas Print.
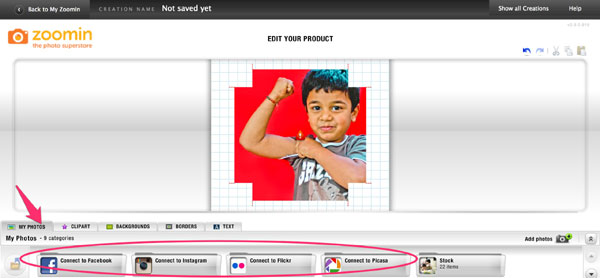
1) Access photos from Facebook, Instagram, Flickr or Picasa. If the photos you would like to use have already been uploaded to your Facebook, Instagram, Flickr or Picasa account, there is no need to upload photos to your ZoomIn account as we allow you to access them directly from inside our creation builder.
To access these photos, once you are inside the product builder, click on the “My Photos” tab located near the bottom of your screen. Then click on the appropriate folder. You will then be prompted to log into the photo sharing site you selected. Once you have logged in you will be able to access all those photos.

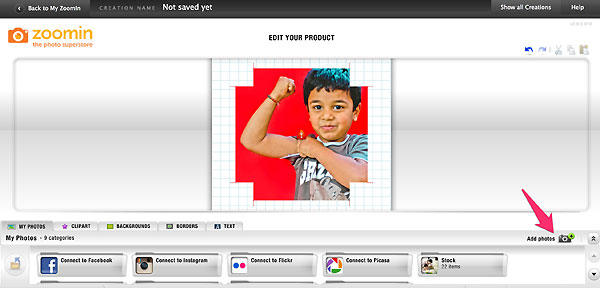
2) Upload photos from your computer. If the photos you would like to use have not been uploaded to one of the photo sharing sites mentioned above, you will need to upload photos to your ZoomIn account.
If you are already inside the product builder, you can upload your photos by clicking “Add photos” located near the bottom of your screen. Once the images have been uploaded, they will appear in the “My Photos” tab inside the product builder.

If you are not in the creation builder, you can upload your photos by going to Albums and clicking on the “Upload” button. Once the images have been uploaded, they will appear in the “My Photos” tab the next time you open the creation builder.
To add photos to your creation, locate the image in the “My Photos” tab that you would like to add. Click on the image and drag it to your Canvas Print.
Comments
0 comments
Article is closed for comments.